How to Organize Notion Dashboard for Personal, Life Goals, Habits & Daily Planning
March 6, 2025
Table of Contents
I love using Notion to manage every aspect of my life. Over the years, I've created a Notion life-tracking system, which helps me track my goals, tasks, projects, habits, and journals all in one place.
In this guide, I will focus on breaking down the structure, layout, and design ideas for organizing and decluttering a Notion dashboard.
Tips 1: Organize your dashboard sections
Your home dashboard should be the primary access point before navigating to individual pages or tracker templates.
In my life dashboard, I like to break it down into sections—for example: goal tracking, daily routine, planning, project management, journaling, and more.
I can easily access these trackers, key stats, and past entries directly from the home page without needing to open each separate Notion tracker.
For instance, I have a Life Tracker positioned at the front of my dashboard:
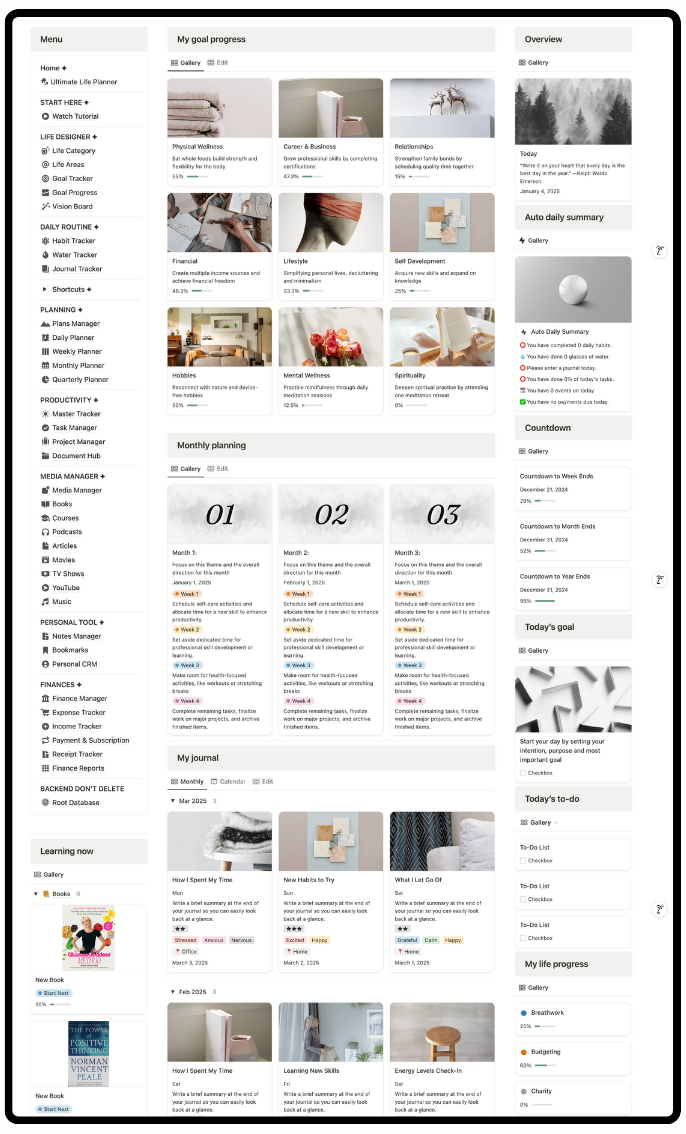
This tracker provides a quick view of my real-time progress toward goals related to physical health, career, and relationships.
Having this tracker on the home dashboard serves as a constant reminder of what I’m working towards and helps keep me accountable.
Tips 2: Automate your daily stats
Manually updating your Notion dashboard every day can be time-consuming.
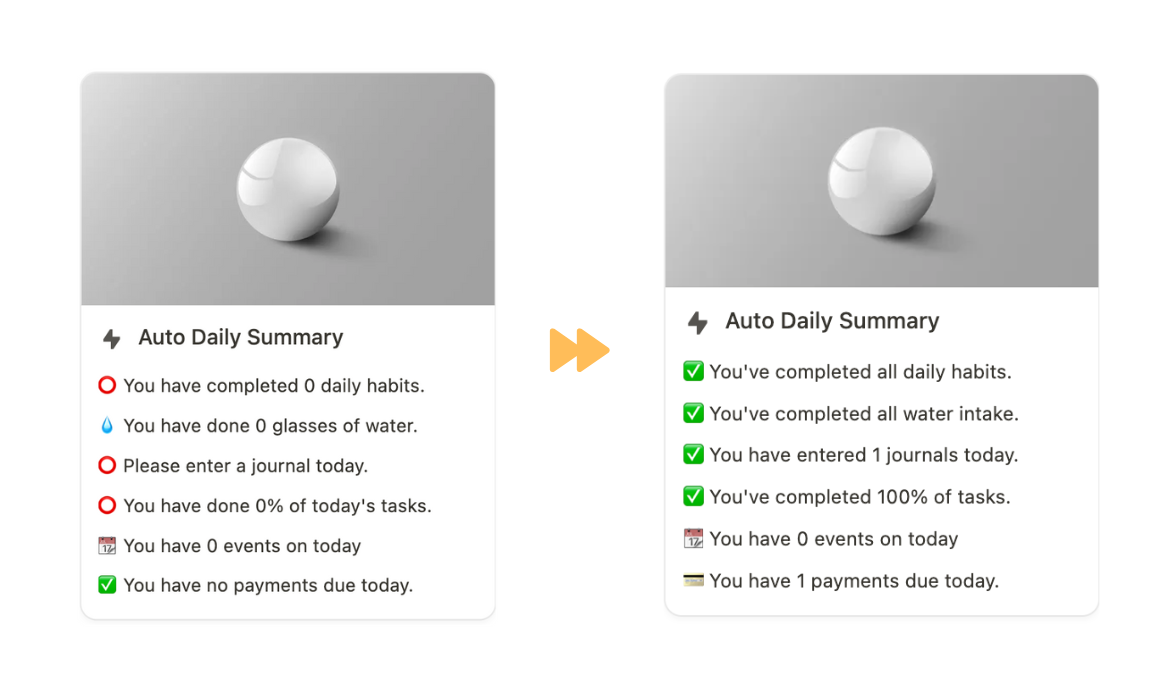
Therefore, I've created a smart automatic summary feature that provides real-time updates on my completion progress as I go through the day.
For example, if I have completed 3 habits today, I can see it directly on the home dashboard with a notification that says,
"⭕️ You've completed 3 daily habits."
If I have completed all the habits, a message will pop up saying,
"✅ You've completed all daily habits."
This automatic summary also shows the total number of water intakes, journal entries, tasks, events, and payments I have completed for the current day. How cool is that?
Tips 3: Prioritize key info on dashboard
Simplifying your dashboard not only makes it visually pleasing but also helps you stay focused on what truly matters.
Here’s how to streamline your Notion setup:
- Include only what you genuinely need on the home page.
- Limit the number of databases visible on the main dashboard.
- Hide elaborate details, content, and descriptions.
- Maintain consistent icons, fonts, and color schemes.
- Follow a hierarchy by using headers (H1, H2, H3), toggles, and columns to organize information logically.
Tips 4: Create custom views
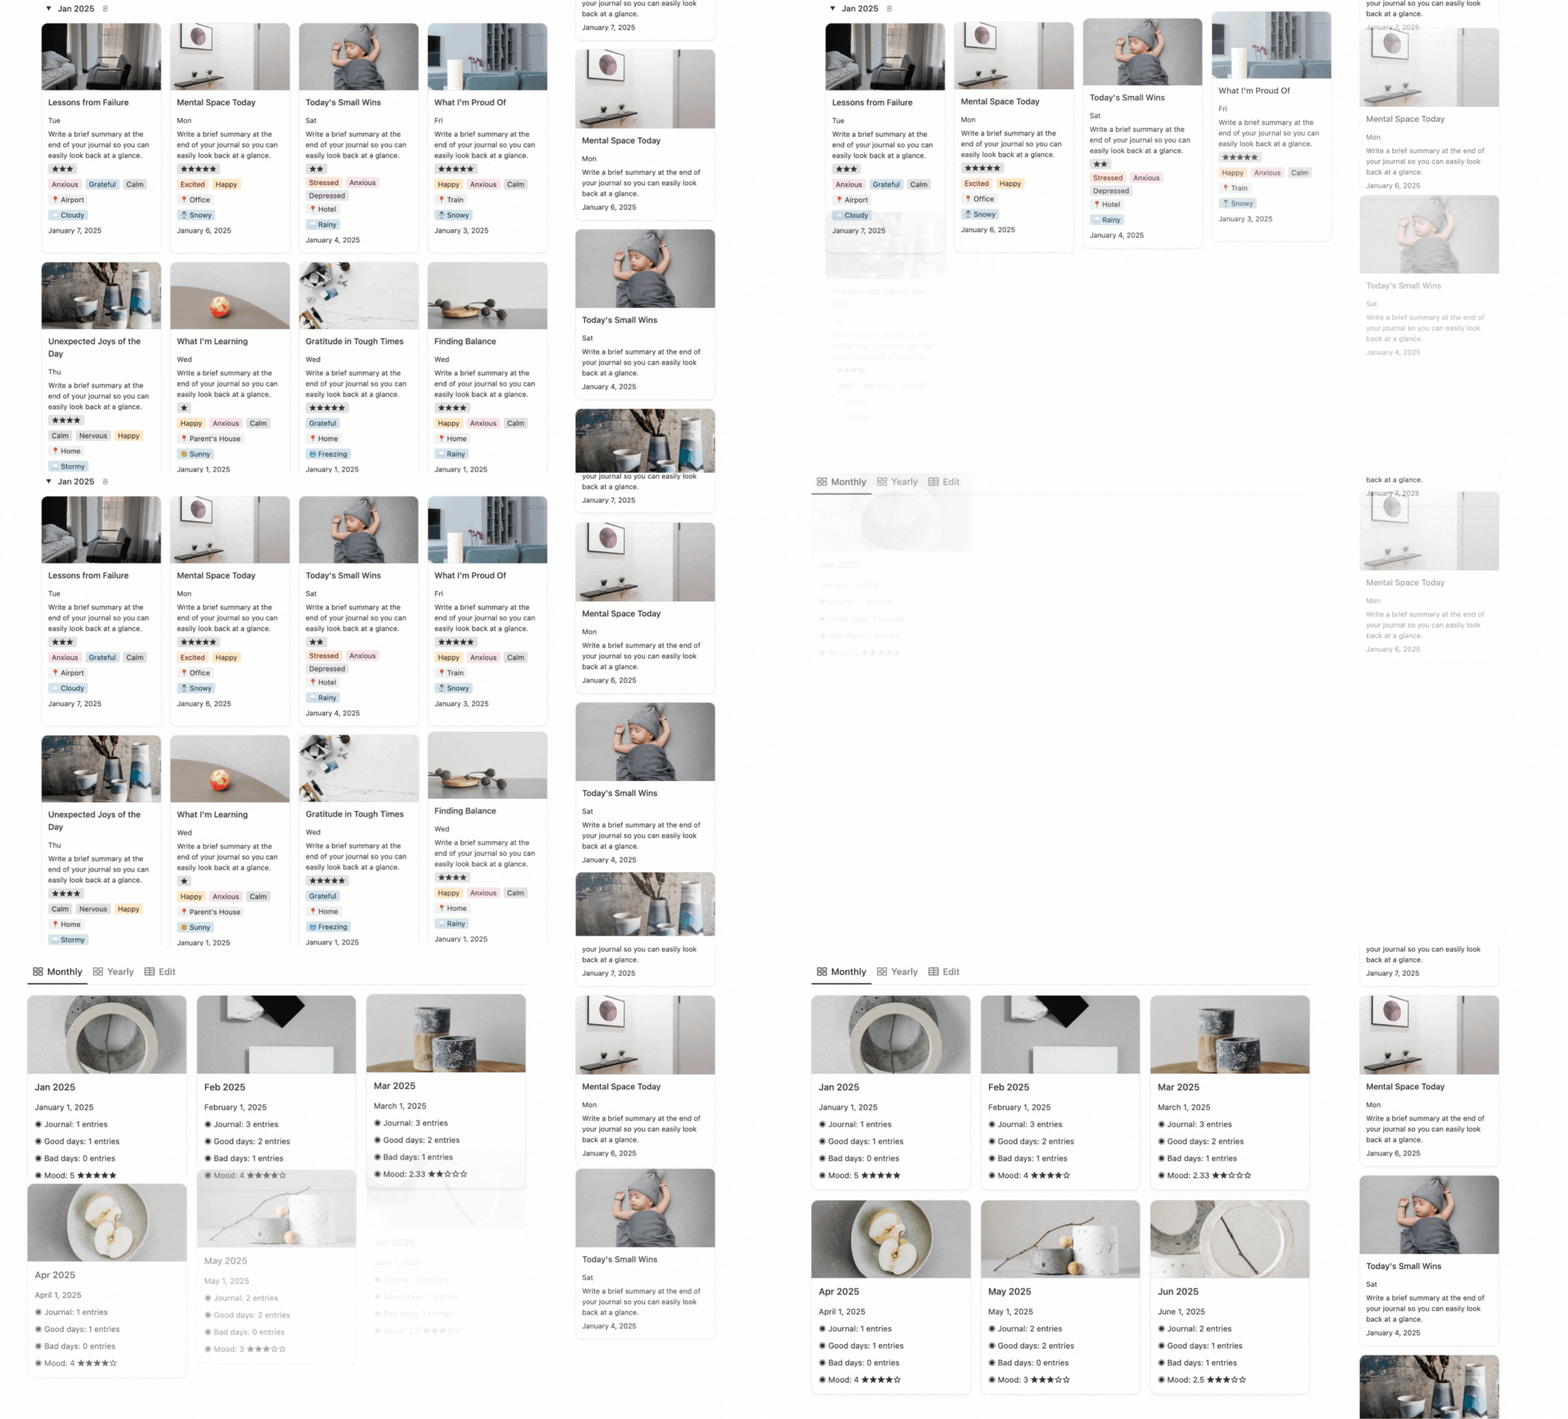
Custom views in Notion allow you to filter, sort, and display information in a way that suits your workflow.
In my Notion Learning Tracker template, I’ve created an efficient way to manage all the content I consume—from books and courses to podcasts and articles:
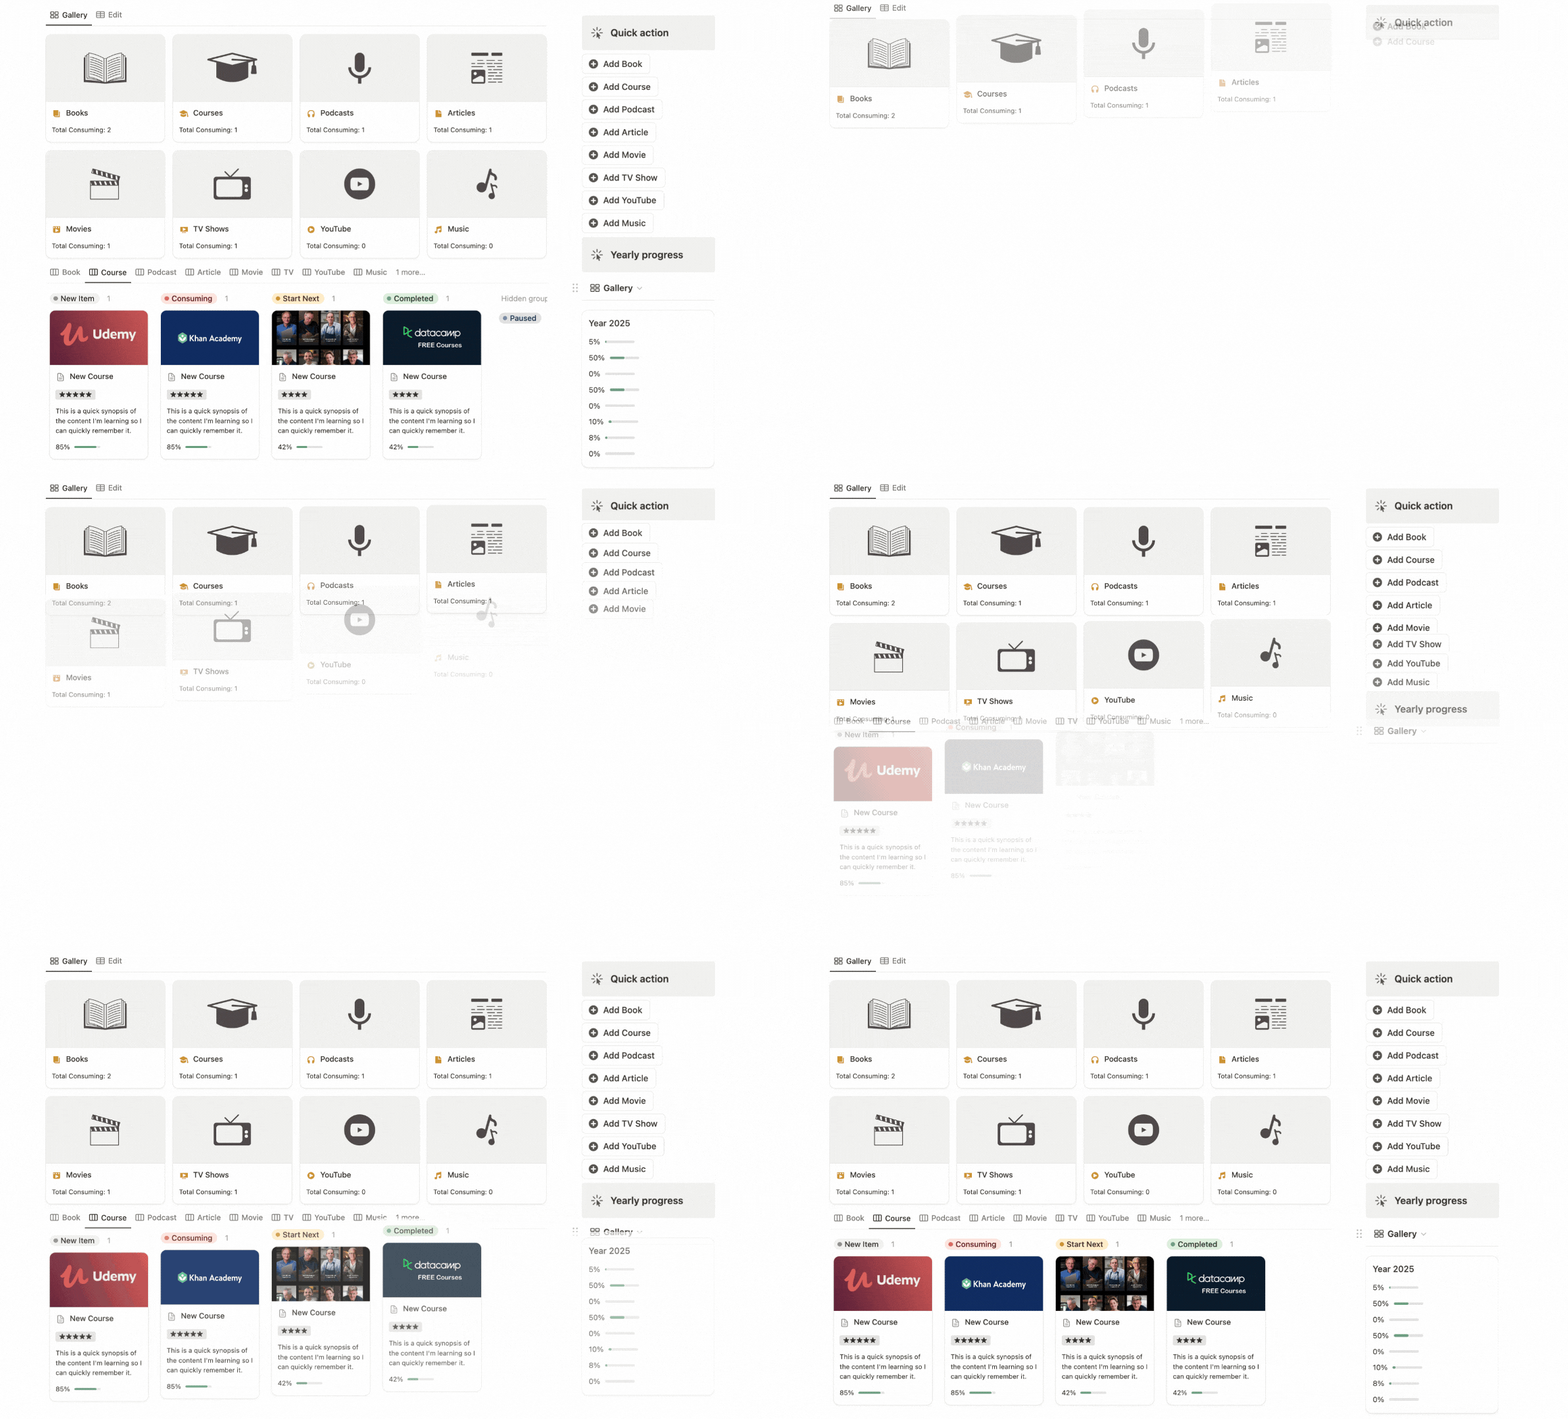
Here’s how I organize it for maximum clarity and focus:
- Separate Tabs for Different Media: I use different views for each content type—like books, courses, podcasts, articles, movies, and TV shows. This makes it easy to switch tabs and focus on one type of content at a time without getting overwhelmed.
- Tagging System: Each entry is tagged by category (e.g., “Self-Development,” “Productivity,” “Health”) to quickly filter and find relevant resources.
- Clear Status Labels: I use status tags like “New Item,” “Consuming,” “Start Next,” and “Completed” to see at a glance what I’m currently learning and what’s on hold.
- Visual Progress Bars: For books and courses, I include a progress bar showing how far I’ve progressed—like “50% Complete”—to stay motivated.
Tips 5: Build a continuous workflow
A Notion dashboard should help you move smoothly from primary to secondary and even tertiary access points.
In my Life Dashboard, I have a "Life Area Progress" on the home section that shows how I am doing.
When I click on each page, I can see a list of goals for each life area:
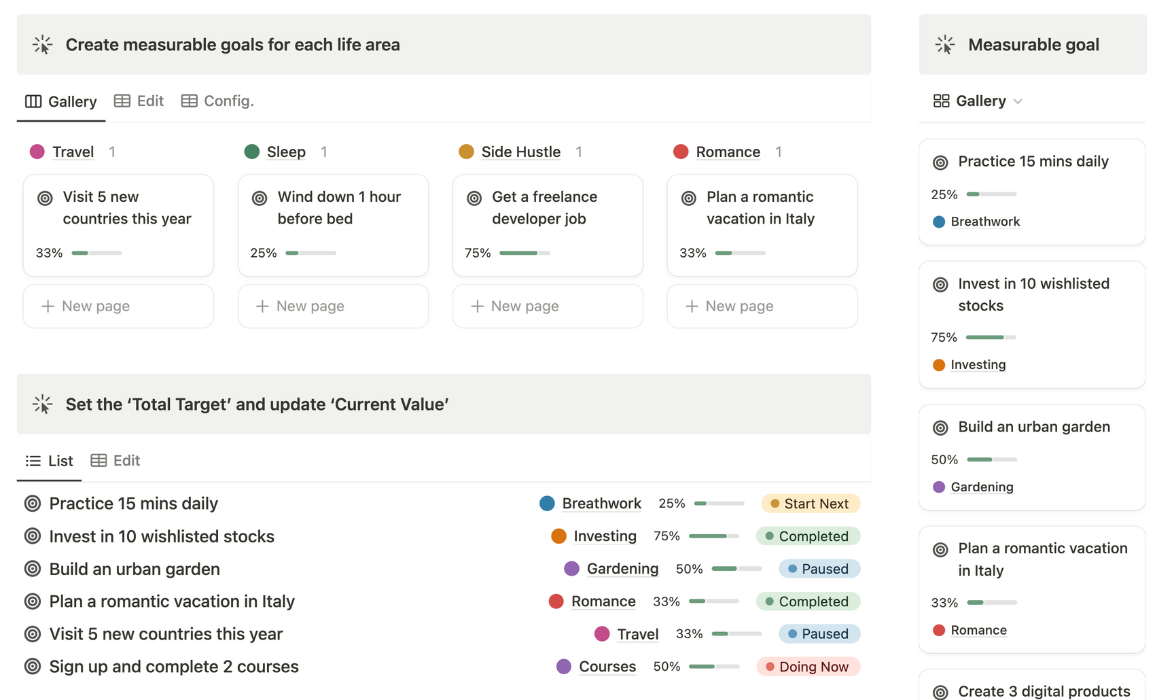
I can also tag related events, tasks, notes, bookmarks, and content in the "Course" area. This way, I can view everything about a specific area in one place without searching for information:

Tips 6: Use a color-coded system
A well-thought-out color-coded system can make your Notion dashboard both visually appealing and highly functional.
By assigning specific colors to different categories, priorities, or statuses, you can quickly scan your dashboard and understand what needs attention without getting overwhelmed.
For example, I like to use color-coded icons to highlight different areas of life goals and modify the tags color to indicate the status of tasks:

Pro Tips:
- Avoid Color Overload: Stick to a limited palette—about 3 to 5 colors—to maintain clarity and prevent your dashboard from looking chaotic. Too many colors can cause cognitive overload, defeating the purpose of color coding.
- Consistent Theme: Apply the same color-coding rules across all pages and templates to build a habit of recognizing what each color stands for. Consistency not only looks better but also helps you process information faster.
- Leverage Background Colors and Highlights
Use background colors for headers or sections to group related information. For example:- Soft gray for information or notes
- Light yellow for reminders or key points
Tips 7: Create custom progress bar
A well-designed progress bar can do more than just track completion status—it can make your Notion dashboard aesthetically pleasing and boost your motivation to get things done.
If you want to customize your Notion progress bar but don't know how, check out my Notion progress bar formulas cheatsheet that you can copy and paste.
Here are the different ways to customize your progress bar:
1. Slice Bars
Using the slice() function in Notion, you can create a progress bar that visually fills up based on your progress. This approach is clean and straightforward, making it easy to see how far you’ve come at a glance.
Example:
slice("■■■■■■■■■■", 0, round(prop("Progress") * 10))- If your progress is 70%, this formula will display: “■■■■■■■□□□”.
2. Emojis as Progress Bars
Emojis can add a playful and visually distinct element to your dashboard. You can use different types of emojis to indicate progress, such as:
- 🌕🌖🌗🌘🌑 for phases of progress.
- 🟩🟨🟧🟥 for different status levels.
- 📚📖 for reading progress or 🎯 for goal completion.
Example Formula:
concat(repeat("🔥", floor(prop("Progress") * 5)), repeat("🕸️", 5 - floor(prop("Progress") * 5)))
3. Percentage Displays
Adding a percentage next to your progress bar makes it more actionable by giving a precise sense of how much is left to do.
Example Formula:
concat("Progress: ", format(round(prop("Progress") * 100)), "%")- Displays: “Progress: 75%”.
4. Color Emojis for Status
Using color emojis can instantly convey the status of your tasks without needing to read labels. This approach helps you scan your dashboard quickly.
Color Emoji Ideas:
- 🟢 Green: Completed or on track.
- 🟡 Yellow: In progress or at risk.
- 🔴 Red: Delayed or urgent.
- 🟣 Purple: Optional or paused.
Frequently Asked Questions
1. What are the must-have templates/trackers on a Personal Notion Dashboard?
A well-organized personal Notion dashboard should include pages and trackers that help manage different areas of your life efficiently. Here are some ideas,
Task Tracker: For managing daily to-dos and priorities. Habit Tracker: To monitor routines like exercise, reading, or meditation. Journal: For reflections, mood tracking, and gratitude logs. Goal Planner: To break down life goals into actionable steps with progress bars. Finance Tracker: For budgeting and tracking expenses. These pages cover key areas of personal management, ensuring everything is in one place.
2. Should I create separate dashboards for personal, work and projects?
If you prefer clear boundaries between personal, work, and project tasks, separate dashboards might work best.
However, a unified dashboard with filtered views can offer a more streamlined experience.
For instance, you can use tags and linked databases to toggle between personal, work, and sports tasks without switching dashboards. This approach allows you to access everything from a central hub while maintaining clarity and focus.
3. What are some effective methods for organizing different areas of life in a Notion dashboard?
Organizing different areas of life efficiently starts with a clear structure and consistent naming conventions.
A popular approach is the PARA method (Projects, Areas, Resources, Archive)—where you create dedicated sections for active projects, ongoing areas of responsibility, reference materials, and archived content.
You can also use a dashboard-based approach that categorizes content into goal tracking, daily planning, learning, and wellness. Custom views, such as kanban boards for tasks and gallery views for resources, can make navigation smoother and visually appealing.
4. How can I get started with building a Notion dashboard without feeling overwhelmed?
Starting with Notion can feel daunting due to its flexibility and endless customization options.
To avoid overwhelm, begin with a simple setup focused on your top priorities. Identify the core areas of your life—such as tasks, habits, and goals—and create basic pages or templates for each.
For example, start with a minimalist task list, a habit tracker, and a daily journal. As you become more comfortable, gradually expand your dashboard by adding more sections, views, and integrations. The key is to build incrementally rather than trying to create a comprehensive system all at once.
5. How do I structure my Notion dashboard to maximize efficiency and keep everything in one place?
To maximize efficiency, consider structuring your dashboard with a three-level hierarchy:
- Home Dashboard: An overview with key widgets like task summary, habit tracker, and quick links.
- Category Pages: Dedicated pages for personal, work, finances, and projects, accessible via the home dashboard.
- Databases and Templates: Central databases linked to category pages, with templates for tasks, notes, and goals.
6. What tips or best practices can help streamline my Notion setup for better organization?
Here are some practical tips:
- Use Templates Efficiently: Save time by using pre-made templates for recurring tasks and meetings.
- Automate with Formulas: Implement formulas for automatic progress tracking and date calculations.
- Color-Code and Icons: Use consistent color codes and icons for faster navigation.
- Limit Databases: Too many databases can slow down navigation; link them instead of creating new ones.
- Review and Declutter: Schedule a monthly review to archive outdated pages and refine your dashboard.
%20removebcg.png)
